Installing on Heroku
IMPORTANT
Recent changes by Heroku have altered how Tabbycat can be deployed on their service.
Heroku Deployments Overview
Tabbycat can be deployed to Heroku in two ways:
A fork-based method, that approximates a ‘1-click’ install experience. Requires no technical background.
A script-based method, which requires running a python script on your local machine. Requires some technical background.
Regardless of method, please note that Heroku no longer offers a free tier of hosting services. However, students with an academic email address now have access to $13 USD worth of credits (per month) to use on the service if they enrol in the GitHub Student Developer Pack. These credits will be sufficient to run 2-3 different tab sites simultaneously.
Please also note Heroku will require a debit/credit card to be attached to your account for verification purposes — even if you have free credits available. If using free credits, you should make note of the (annual) expiration of your GitHub student status and plan to either renew your status or cancel any Heroku services you don’t want to pay for.
Heroku Deployments using a Fork
GitHub Account Setup
Create an account at GitHub. If you are a student, be sure to register with your academic email address.
If you are a student: sign-up to claim the Student Pack so you will receive free Heroku credits. Note that it may take several days for the claim to process.
Heroku Account Setup
Create an account at Heroku, or use an existing Heroku account.
Once your GitHub student status has been confirmed, use the button here to claim your free monthly credits.
GitHub Fork and Deployment
In order to use a user-friendly ‘1-click deployment button’, you will need to make a ‘fork’ (personal copy) of Tabbycat on Github. To do so:
Login to GitHub and go to the main Tabbycat project page
Click the Fork button in the top-right
On the next page, Uncheck the button that says Copy the develop branch only then click Create Fork
The next page will show your copy of Tabbycat. Take note of your Github username and your fork’s name in the top-left, e.g. JaneSmith/tabbycat
Open a new tab in your web browser and copy-paste in this URL without hitting enter (yet):
https://heroku.com/deploy?template=https://github.com/YOUR_GITHUB_NAME/YOUR_FORK_NAME/tree/master
In the URL address, replace
YOUR_GITHUB_NAMEwith your GitHub username (e.g. JaneSmith) and replaceYOUR_FORK_NAMEwith the name of your fork (e.g. tabbycat)Hit enter and fill out the details required. After the deployment process completes, you should have a new Tabbycat deployment
Heroku Deployments using the Deploy Script
We’ve tested these instructions successfully on Windows, Linux and macOS.
Requisite technical background
You will need to (briefly) work with a command-line interfaces to complete this method. When we say “command-line”, on Windows we mean Command Prompt, and on Linux and macOS we mean Terminal (or your favourite command shell).
If you haven’t used a command-line interface before, you may want to watch a very general and introductory tutorial. We will be providing the commands for you to enter, but you will need to know where to find the command-line and how to put text into it.
If you’re experienced with the command-line and Git, skip ahead to our TLDR list of commands.
Account Setup
Heroku is a platform as a service on which Tabbycat can be installed to be available on the internet. Naturally, this requires you to have a Heroku account. Head to the site and sign-up for one.
Note
During the setup process, Heroku will ask you to verify your account by adding a credit card. A standard Tabbycat site will not charge your card — charges only accrue if you deliberately add a paid service in the Heroku dashboard.
1. Install dependencies
Install the Heroku Command Line Interface (CLI), then log in by running this in your command-line (and entering in your Heroku account details):
heroku login
If you don’t already have Git, follow the instructions on the GitHub website to set up Git.
2. Download Tabbycat with Git
Once git is installed, you can use it to download a copy of Tabbycat with these commands in your command-line:
git clone -b master https://github.com/TabbycatDebate/tabbycat.git
3. Run the Deploy Script
Navigate on the command-line your Tabbycat directory. If you have not changed directories in the command-line since you cloned Tabbycat, this should just be:
cd tabbycat
Run the script to deploy the app to Heroku. Replace
yourappnamewith your preferred URL. Your website will be atyourappname.herokuapp.com.
python deploy_heroku.py yourappnameThis script has other options that you might find useful. Run
python deploy_heroku.py --helpfor details.The script may work away on its own for 10-30 minutes before it asks you some questions to answer. When finished, it will open the app in your browser. It should look something like this:
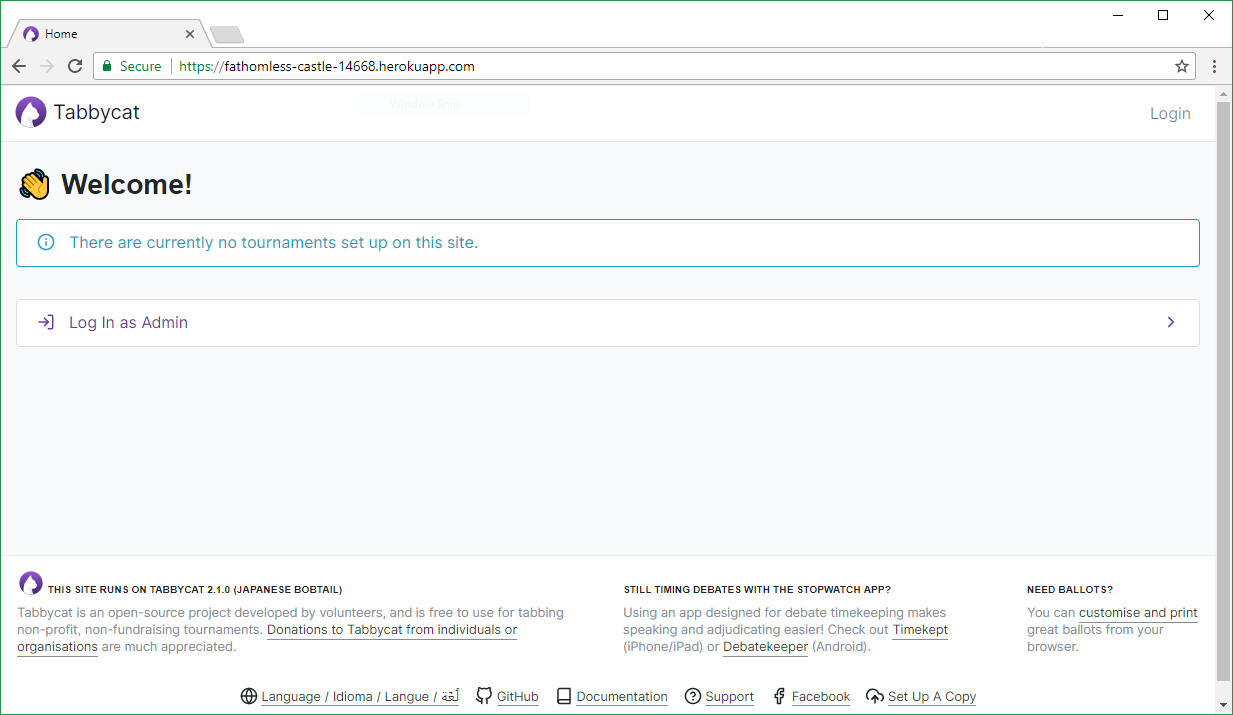
That’s everything! You can then login with the account that you made by answering the script’s questions.
TLDR commands
Warning
We provide a “short version” for experienced users. Don’t just copy and paste these commands before you understand what they do! If things aren’t set up perfectly they can fail, so it’s important to supervise them the first time you do them. If this is all new to you, read the long version of the instructions below.
git clone https://github.com/TabbycatDebate/tabbycat.git
cd tabbycat
git checkout master
python deploy_heroku.py yourappname
Heroku options you may want to change
If you have a large tournament, you may want to customize your Heroku app. This section provides some guidance on upgrades and settings you may wish to consider. Some of these configurations require you to have the Heroku Command Line Interface (CLI) installed.
Upgrading your database size
The free plan of Heroku Postgres, “Hobby Dev”, should work for most small tournaments. For large tournaments, however, you may find that you exceed the 10,000-row limit of this plan. It’s difficult to give general guidance on how many rows you’re likely to use, because it depends on which features of Tabbycat you use (e.g., if you use adjudicator feedback). But to give some idea:
Australs 2016, which had 74 teams, 8 preliminary rounds and heavily used adjudicator feedback, ended up at around 30,000 rows.
The Asia BP championships 2017 had 100 teams, 6 preliminary rounds, and mandatory feedback (i.e. 100% return rates) used 15,000 rows.
A 3 vs 3 tournament with 54 teams, 5 preliminary rounds, and which only lightly used adjudicator feedback ended up using around 4,500 rows
If you need more than 10,000 rows, you’ll need to upgrade to a paid Heroku Postgres Plan. The 10,000,000 rows allowed in the lowest paid plan, “Hobby Basic”, should certainly be more than sufficient.
If you’re not sure, you can always start at Hobby Dev—just be prepared to upgrade during the tournament if you run close to capacity.
Custom domain names
Your Heroku app will be available at yourappname.herokuapp.com. You may want it to be a subdomain of your tournament’s website, like tab.australasians2015.org. If so, you’ll need to configure your custom domain and SSL. Instructions for both are in the Heroku Dev Center:
The custom domain name basically requires two things: a DNS CNAME entry on your website targeting yourappname.herokuapp.com, and the custom domain configured on Heroku using heroku domains:add tab.yourwebsite.com. You’ll also need to provide an SSL certificate for your custom domain and add it using the heroku certs:add command.
If you’re using Tabbycat’s email notifications, you might also configure your email provider to use domain authentication—see Configuring an email provider.
Time zone
If you want to change the time zone you nominated during deployment, you can do so by going to the Heroku Dashboard, clicking on your app, going to the Settings tab, clicking Reveal Config Vars and changing the value of the TIME_ZONE variable. This value must be one of the names in the IANA tz database, e.g. Pacific/Auckland, America/Mexico_City, Asia/Kuala_Lumpur. You can find a list of these on Wikipedia in the ‘TZ*’ column.
Email provider
Changed in version 2.6: Tabbycat no longer automatically provisions SendGrid via Heroku.
Tabbycat does not come with an email provider. Before Tabbycat will send emails, you will need to install a third-party email provider yourself. To do so, you may add/change the following config vars:
DEFAULT_FROM_EMAIL: Email to send fromEMAIL_HOST: Host serverEMAIL_HOST_USER: Username for authentification to hostEMAIL_HOST_PASSWORD: Password with usernameEMAIL_PORT(default 587): Port for serverEMAIL_USE_TLS(default True): Whether to use Transport Layer Security (True/False)
See Configuring an email provider for more information, including a few options for email service providers.
Upgrading an existing Heroku app
Note
For most users, we recommend starting a new site for every tournament, when you set up the tab for that tournament. There’s generally not a pressing need to upgrade Tabbycat after a tournament is concluded, and every time you deploy a new site, you’ll be using the latest version at the time of deployment.
To upgrade an existing Heroku-based Tabbycat app to the latest version, you need to deploy the current version of Tabbycat to your Heroku app. There are several ways to do this. We list one below, primarily targeted at users with some background in Git.
The essence of it is that you need to create a Git remote for your Heroku app (if you don’t already have one), then push to it.
Attention
You should always back up your database before upgrading Tabbycat.
You’ll need both Git and the Heroku CLI, and you’ll need to be logged in to the Heroku CLI already.
Take a backup of your database:
$ heroku pg:backups:capture
If you haven’t already, clone our Git repository and check out the master branch:
$ git clone https\:\/\/github.com/TabbycatDebate/tabbycat.git
$ git checkout master
If you’ve already cloned our Git repository, don’t forget to pull so you’re up to date:
$ git checkout master
$ git pull
Check to see if you have a Git remote already in place:
$ git remote -v
heroku  https://git.heroku.com/mytournament2018.git (fetch)
heroku  https://git.heroku.com/mytournament2018.git (push)
If you do, the name of the remote will be on the left (
herokuin the above example), and the URL of your Git repository will be on the right. In the example above, our Tabbycat site URL would bemytournament2018.herokuapp.com; the Git remote URL is thenhttps://git.heroku.com/mytournament2018.git.If a Git remote URL for your Tabbycat site doesn’t appear, then create one:
$ heroku git:remote --app mytournament2018 --remote heroku
set git remote heroku to https://git.heroku.com/mytournament2018.git
Tip
If you tab many tournaments, it’ll probably be helpful to use a name other than
heroku(say,mytournament2018), so that you can manage multiple tournaments.
Push to Heroku:
$ git push heroku master
This will take a while to complete.